
The best bike handlebar extender is the one that fits your bar diameter, stays rock-solid over rough pavement, and places your devices where you can glance without twisting your wrists.
If you have a light, a phone mount, a bike computer, maybe even a bell, your handlebar real estate disappears fast. Many riders “solve” it by stacking clamps on top of each other, and that’s when things start slipping, rattling, or blocking cables.
This guide keeps it practical: what actually makes an extender stable, which types match different bikes, a quick fit checklist, and a short list of reliable picks by use-case for 2026.
What a handlebar extender really does, and when it helps
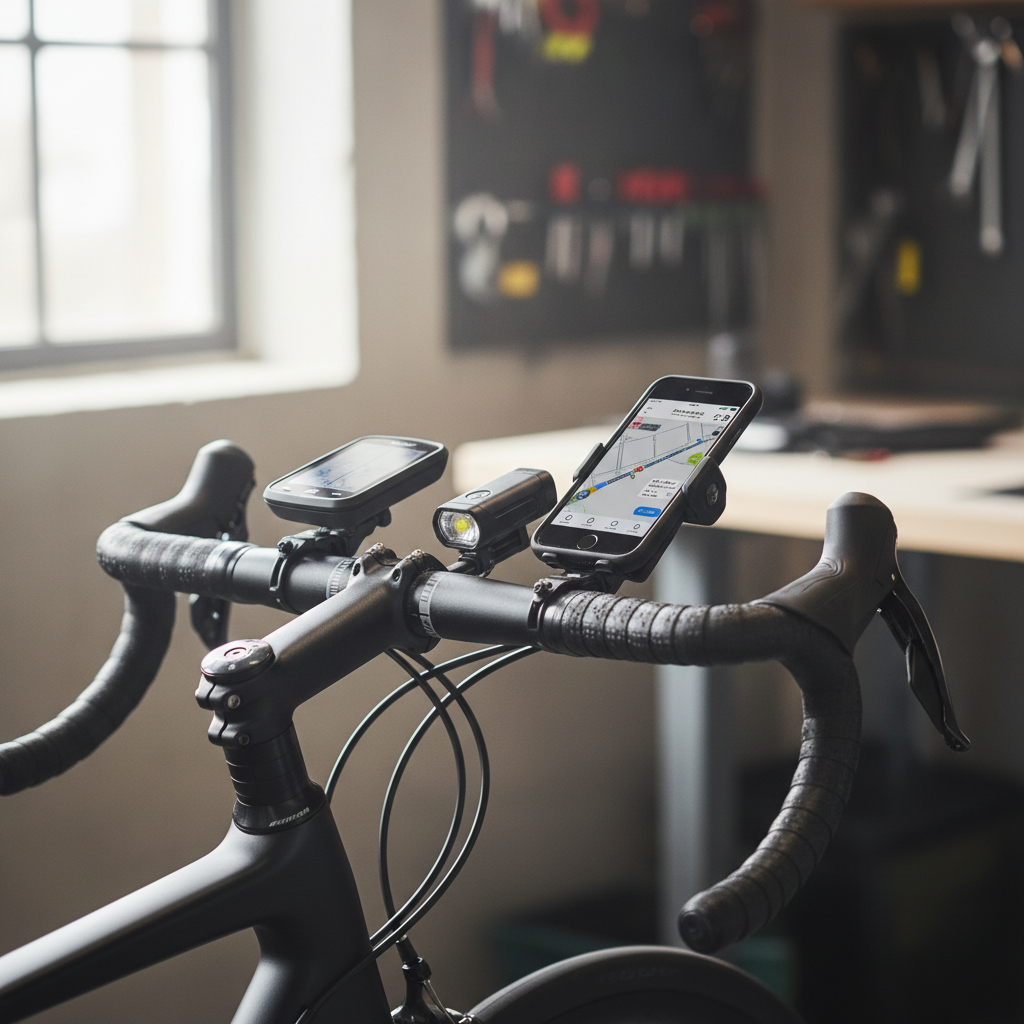
A handlebar extender is a short auxiliary bar that clamps to your existing handlebar, creating extra mounting space for accessories. The best ones don’t just add room, they reduce clutter by letting you line devices up in one clean zone.
Where it tends to help most:
- Commuting: front light + bell + phone mount, without blocking your grip positions
- Fitness/road rides: computer centered, light tucked below, cleaner “cockpit”
- Gravel: room for a bigger light or action camera, while keeping cables unpinched
- E-bikes: adding accessories without interfering with the display/controller
When it’s not the right fix: if your bar is already cramped by integrated systems (some e-bike displays, aero cockpits), or if you’re fighting a slipping problem caused by wrong clamp size rather than lack of space.
Why extenders slip or feel sketchy (real-world causes)
Most complaints trace back to fit and leverage. An extender adds a second lever arm, and small issues become obvious the first time you hit a pothole.
- Wrong clamp diameter: common bars are 31.8 mm at the center, 25.4 mm on some city bikes, and 35 mm on a number of modern MTB setups. A “close enough” fit often creeps loose.
- Smooth-on-smooth contact: polished aluminum clamps on polished bars can rotate under load, especially with heavier lights or a phone.
- Overloading with weight: a large phone + thick case + metal mount + action cam can exceed what budget extenders can hold without flex.
- Bad placement: mounting too far forward increases bounce, putting weight on the outer edge increases twisting.
- Torque guesswork: tightening “until it feels right” can still be too loose, or worse, too tight and damaging to carbon.
According to Park Tool, correct fastener torque matters because under-tightening can allow slipping, while over-tightening can damage components, especially on carbon parts.
Quick fit checklist: know your bar before you buy
Do this before shopping. It saves you from the “it looked universal” mistake.
- Handlebar clamp diameter: measure the round section where the extender will clamp, not the tapered area near the stem.
- Bar material: aluminum is forgiving; carbon needs more care and usually a torque wrench and carbon assembly paste, depending on manufacturer guidance.
- Accessory count: list what you’re mounting and approximate weight, especially if adding a phone or camera.
- Available straight section: many bars curve quickly; you need enough straight area so the clamp sits flat and doesn’t pinch cables.
- Mounting preference: do you want devices above the bar (easy to see) or below (cleaner, less wind, sometimes less clutter)?
If your setup includes carbon bars or a very expensive integrated cockpit, it may be worth checking your bike brand’s accessory mounting guidance, or asking a shop to confirm safe clamp zones.
Top picks for 2026 (by use-case, not hype)
There isn’t one extender that wins for everyone. Below are options that tend to be widely available in the US and consistently chosen for specific needs. When you shop, prioritize the correct diameter and solid hardware over fancy claims.
Best overall for most riders: KAPVOE Handlebar Extender (aluminum, dual clamp)
Often a good “default” because it’s simple, light enough, and typically includes shims for common sizes. It works well for a computer + light combo if you keep heavier items close to the clamp.
Best for clean road/gravel cockpit: K-Edge Handlebar Mount (computer-centric alternative)
If your main goal is centering a bike computer and tidying the front end, a dedicated out-front computer mount can beat an extender. Many riders pair this with a separate light mount for a cleaner setup than an extra crossbar.
Best for MTB stiffness: Race Face Turbine R (use with compatible bar sizes)
Mountain biking punishes flex. A sturdier extender or a purpose-built accessory mount can help, but only if the clamp matches your bar and you don’t hang a heavy phone far forward.
Best for budget commuters: ROCKBROS Handlebar Extender
Usually a solid value for lights and bells. For daily commuting it can be “good enough,” but pay attention to bolt quality and re-check tightness after the first few rides.
Comparison table: what to look for (and what it means)
Use this as a buying filter. The best bike handlebar extender for you typically scores well in the rows that match your riding style.
| Feature | Why it matters | Best for | Watch-outs |
|---|---|---|---|
| Clamp diameter options (31.8/25.4/35) | Fit drives stability and prevents rotation | Everyone | “Universal” without real sizing can slip |
| Dual-bolt vs single-bolt clamp | More even pressure, less twisting | Heavier accessories, rough roads | Over-tightening risk on carbon |
| Bar length (short vs long) | Long adds space but increases leverage | Multi-accessory setups | Long bars can bounce if overloaded |
| Material (aluminum vs carbon) | Stiffness and weight, clamp friction | Most riders choose aluminum | Cheap alloys may strip threads |
| Accessory mount standards | Some lights/computers need adapters | Computer + light combos | Extra adapters add stack height |
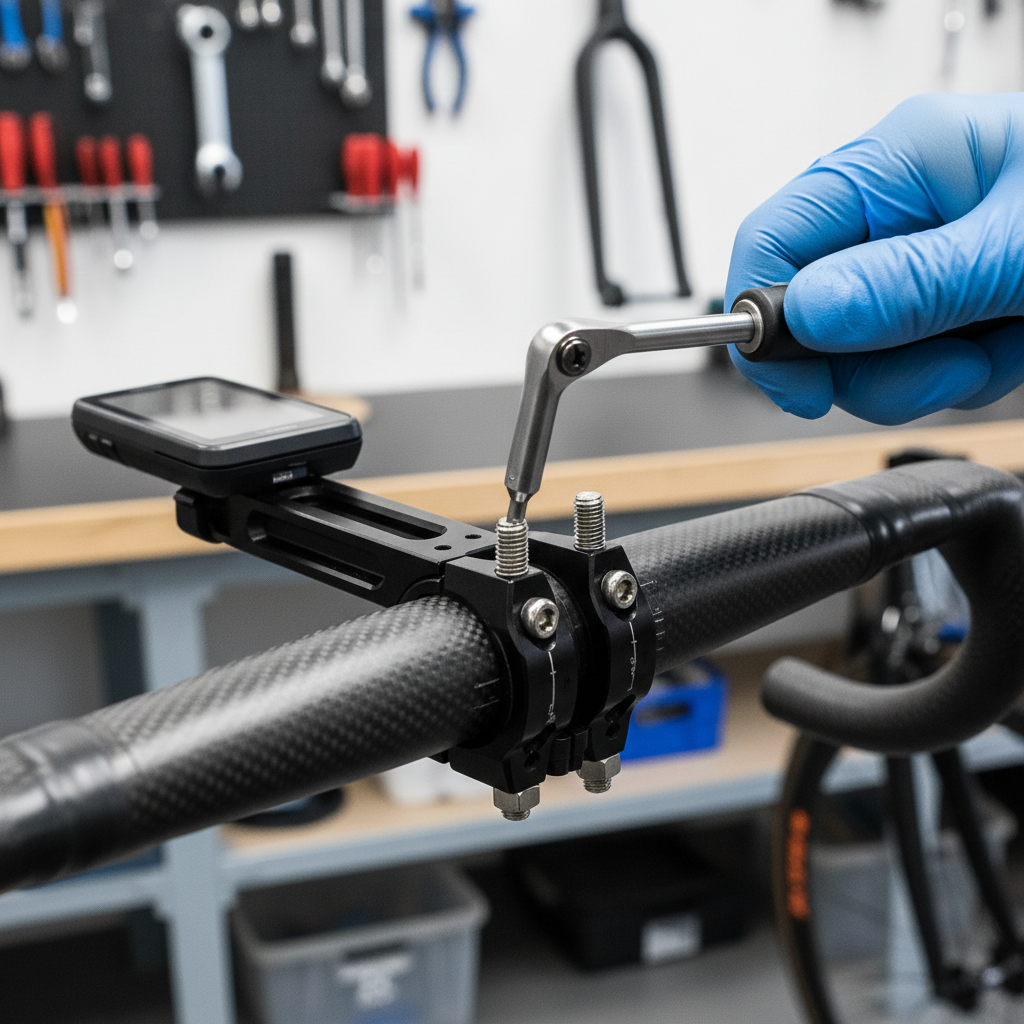
How to install it so it stays put (practical steps)
Even a great extender fails with a rushed install. This is the routine that tends to prevent annoying mid-ride adjustments.
- Clean the clamp zone: wipe bar and clamp interior so grit doesn’t cause uneven contact.
- Dry fit first: confirm cables aren’t pinched and your hands won’t hit the extender when you sprint or climb.
- Center weight close to the clamp: put the heaviest item nearest the clamp, lighter items farther out.
- Use appropriate friction aid: carbon assembly paste may help on carbon parts, but follow component manufacturer guidance.
- Tighten evenly: alternate bolts so pressure stays balanced, don’t crank one side down completely.
- Torque if possible: a small torque wrench prevents both slipping and overtightening; if you’re unsure, a shop can set it quickly.
- Shake test: before riding, push down and twist accessories with firm pressure, if it moves in your hands, it will move on the road.

Common mistakes and safety notes (worth reading)
This is where many “bad product” reviews come from, when the real issue is mismatch or overload.
- Mounting on a tapered section: the clamp sits crooked and will creep loose.
- Hanging a phone far forward: leverage increases bounce, the camera stabilization on some phones may also dislike constant vibration.
- Ignoring clearance: on some bikes, the extender can interfere with brake/shift cables when you turn fully.
- Clamping to carbon without guidance: risk varies by component, if you’re not sure about torque limits or clamp zones, ask a shop.
- Using it to mount heavy “non-bike” items: speakers, large power banks, and metal brackets add weight fast and may be unsafe.
According to The American Academy of Pediatrics, wearing a properly fitted helmet reduces the risk of head injury; if you’re adding cockpit accessories, keep your setup tidy so you can steer and brake without distraction.
Key takeaways and a simple buying decision
If you only remember a few things, make them these:
- Fit beats brand: correct clamp diameter and a stable clamp design matter more than marketing.
- Keep heavy items close: stability improves immediately when weight sits near the clamp.
- Road vs MTB needs differ: rough terrain asks for stiffer hardware and lighter loads out front.
- Consider alternatives: for many road riders, an out-front computer mount + separate light mount feels cleaner than a long extender bar.
My practical rule: if you want to mount a computer and a light, a compact extender is usually enough; if you’re trying to mount a phone, camera, and big light all together, you may need to rethink the layout instead of simply adding more bar.
Pick one extender that matches your bar, install it carefully, then re-check tightness after a few rides, that’s the easiest way to end the cockpit clutter without creating a new problem.