
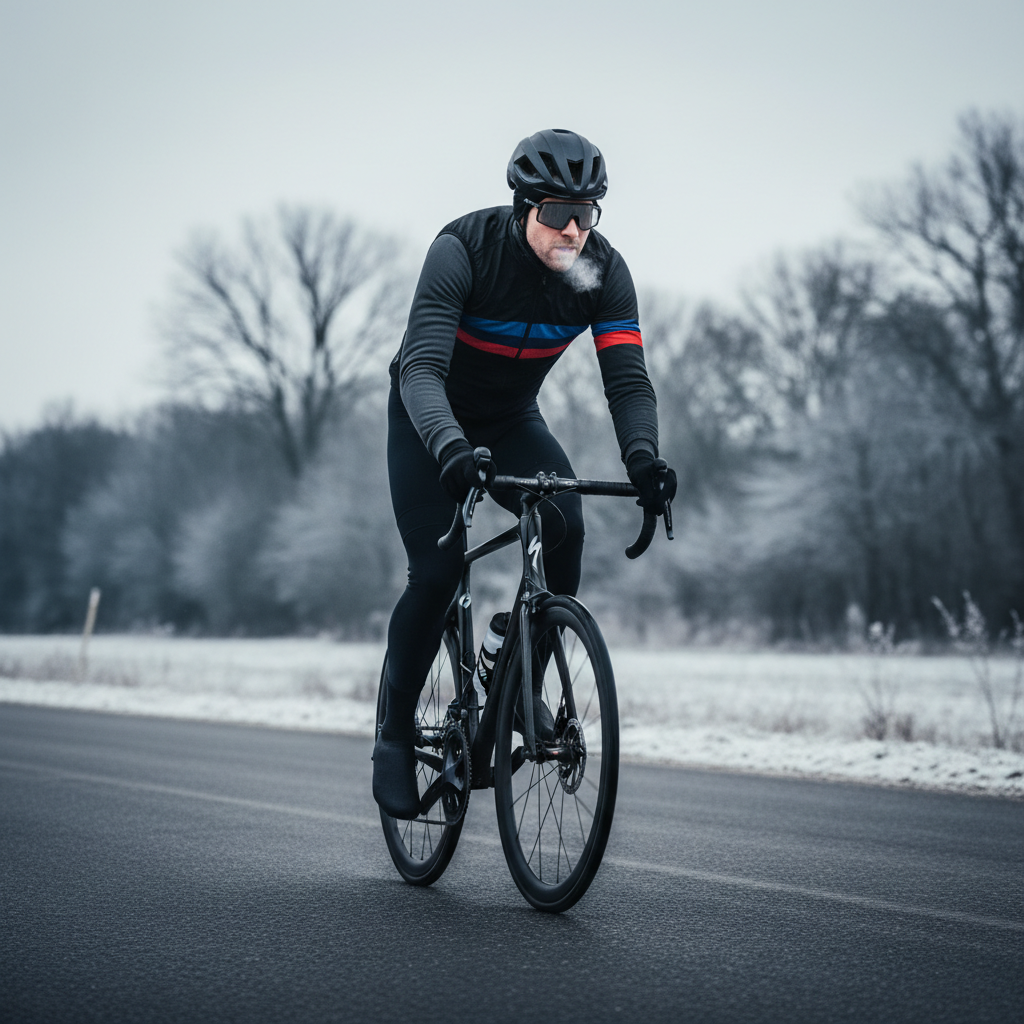
Best cycling knee warmers for winter come down to two things most riders overlook until it’s miserable outside: they must stay put when you’re pedaling, and they must manage sweat without turning clammy on descents. If you get either wrong, your knees feel cold even when the rest of you feels fine.
Knee comfort matters more than people admit, because cold joints can make every ride feel “off,” even at moderate temps. And if you’ve ever finished a winter ride with stiff knees, you already know it’s not just about being tough, it’s about being smart with layers.
This guide helps you choose winter knee warmers by real-world conditions, not marketing terms. We’ll cover materials, temperature ranges, fit tricks that prevent sliding, and a short comparison table so you can match a pair to your riding style.
What makes a good winter knee warmer (and what doesn’t)
Winter knee warmers look simple, but the best pairs solve a few competing demands: warmth vs breathability, compression vs comfort, and grip vs skin irritation. The “right” balance depends on whether you ride steady endurance, punchy intervals, or long descents.
- Thermal fabric that still breathes: Fleece-backed Lycra is common for cool-to-cold rides. For wetter climates, a lightly wind-resistant face fabric can help, but too much wind block often traps moisture.
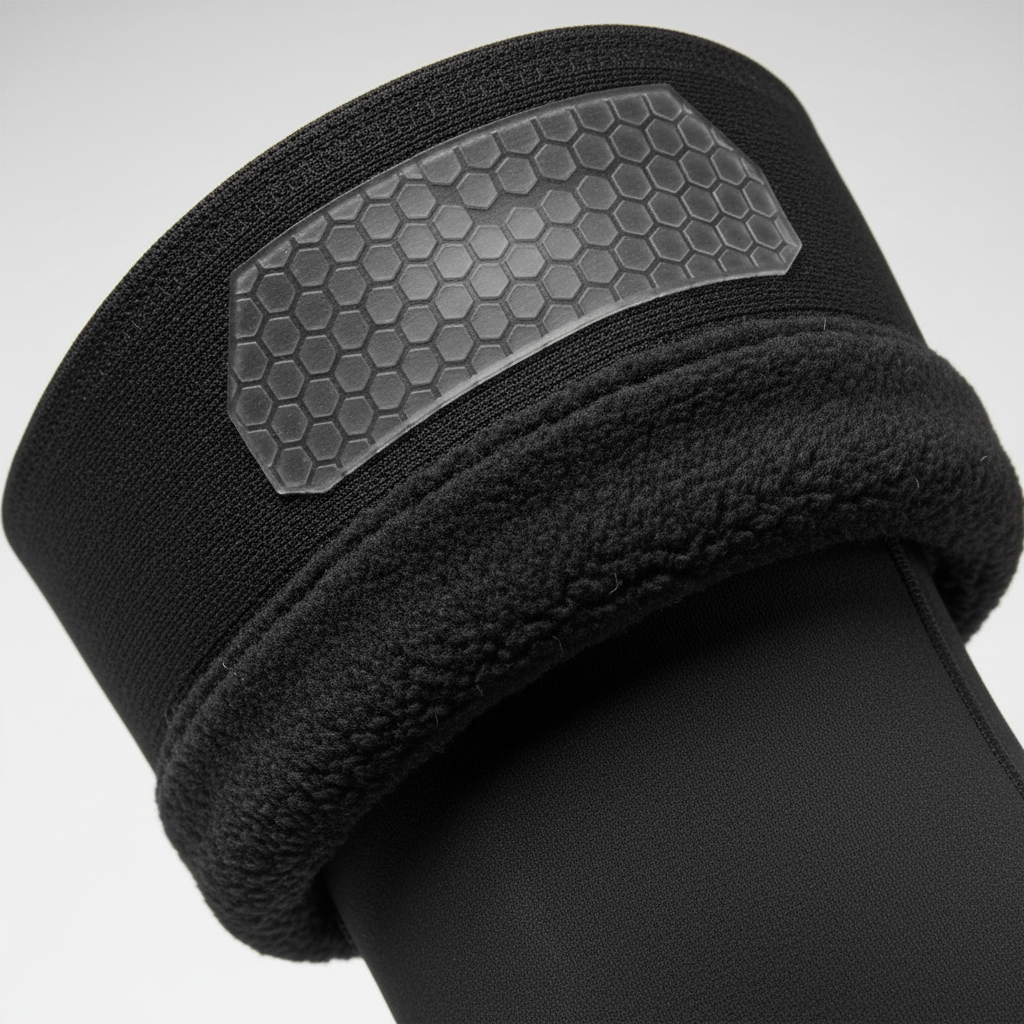
- Secure grippers that don’t bite: Silicone dots or bands work, yet the best ones feel wide and smooth. Narrow grippers can roll and create pressure points.
- Anatomical shaping: A pre-bent knee panel reduces bunching behind the knee, which is often what causes rubbing on longer rides.
- Seam placement that respects movement: Flatlock seams usually feel better. Bulky seams across the kneecap can get annoying fast.
- Packability: If your winter includes big temperature swings, being able to peel them off and stash them matters more than you’d think.
What doesn’t help much: “one-size-fits-most” with vague sizing, ultra-thick neoprene-style warmers for normal road riding, and super tight compression that feels great for five minutes but becomes distracting after an hour.
Quick comparison: which type fits your winter rides?
Instead of naming “the one best” for everyone, it’s more useful to choose a category. Here’s a practical way to map knee warmers to conditions most U.S. riders see.
| Type | Best for | Typical feel | Watch-outs |
|---|---|---|---|
| Thermal fleece-backed | Dry/cool to cold rides | Warm, breathable | Can feel chilly in strong wind on fast descents |
| Wind-resistant front panel | Windy routes, long descents | More “shielded” | May trap sweat if you run hot |
| Water-repellent (DWR-treated) | Light drizzle, road spray | Stays drier outside | DWR wears off, needs care |
| Insulated/heavyweight | Very cold, low-intensity rides | Cozy, less flexible | Overheats easily during efforts |
If you’re shopping for the best cycling knee warmers for winter, most riders end up happiest with thermal fleece-backed as the “default,” then add wind or water protection only when their routes demand it.
How to pick the right warmth level by temperature (realistic ranges)
Temperature guides can be messy because wind, humidity, and effort level change everything. Still, you can use these ranges as a starting point, then adjust after a couple rides.
- 50–60°F (10–16°C): Light knee warmers or thinner thermal fabric, mostly for the first hour or early-morning starts.
- 40–50°F (4–10°C): Standard thermal fleece-backed is usually the sweet spot, warm without feeling swampy.
- 30–40°F (-1–4°C): Thermal plus better wind protection, especially if you descend a lot or ride fast group pace.
- Below 30°F (-1°C): Many riders move to full tights, or layer knee warmers under tights depending on fit. If your knees get cranky, consider being conservative here.
One useful trick: if you’re comfortable standing outside before rolling, you may be underdressed once you start sweating and hitting descents. Aim for “a little cool” at the start, not “already chilled.”
Fit check: stop sliding, bunching, and cold gaps
Most complaints about winter knee warmers are fit complaints. Warm fabric can’t do much if it creeps down your calf or leaves a gap above the kneecap.
5-point self-check before you commit
- Top overlap: With your bib shorts on, the warmer should overlap the short hem by about 1–2 inches, no exposed strip when you’re in riding position.
- Kneecap coverage: The center panel should stay centered when you bend your knee, not drift to the inside.
- No “cord” behind the knee: If you feel a tight line when pedaling, sizing or shaping is off.
- Gripper comfort: You should feel secure contact, not pinching. Red marks that linger can mean too small.
- Length matches your leg: Taller riders often need longer cut warmers; if you’re constantly re-adjusting, try a different brand’s pattern.
According to USA Cycling... knee pain can have multiple causes and training load matters, but keeping joints warm is a common comfort strategy in cold-weather riding. If your knees are already sensitive, prioritize consistent coverage over shaving a few grams.
Material choices: thermal, wind block, and water resistance
This is where “best cycling knee warmers for winter” becomes personal. Two riders can be in the same weather and want totally different fabrics based on how much they sweat and how hard they ride.
- Thermal fleece-backed Lycra: The workhorse. Flexible, easy to layer, usually the best starting point for U.S. winters that bounce between chilly and cold.
- Wind-front panels: Helpful if your route is exposed or you do long downhill sections. But if you ride high-output intervals, you may feel damp buildup.
- DWR water repellency: Great for road spray and light rain. Just keep expectations reasonable, DWR resists water, it doesn’t make a garment fully waterproof.
- Merino blends: Comfortable across a wider range and often less “clammy,” though durability varies by knit and reinforcement.
Care matters more than people expect. Harsh detergents and high heat can shorten the life of grippers and water-repellent finishes, so a gentle wash and air dry usually pays off.
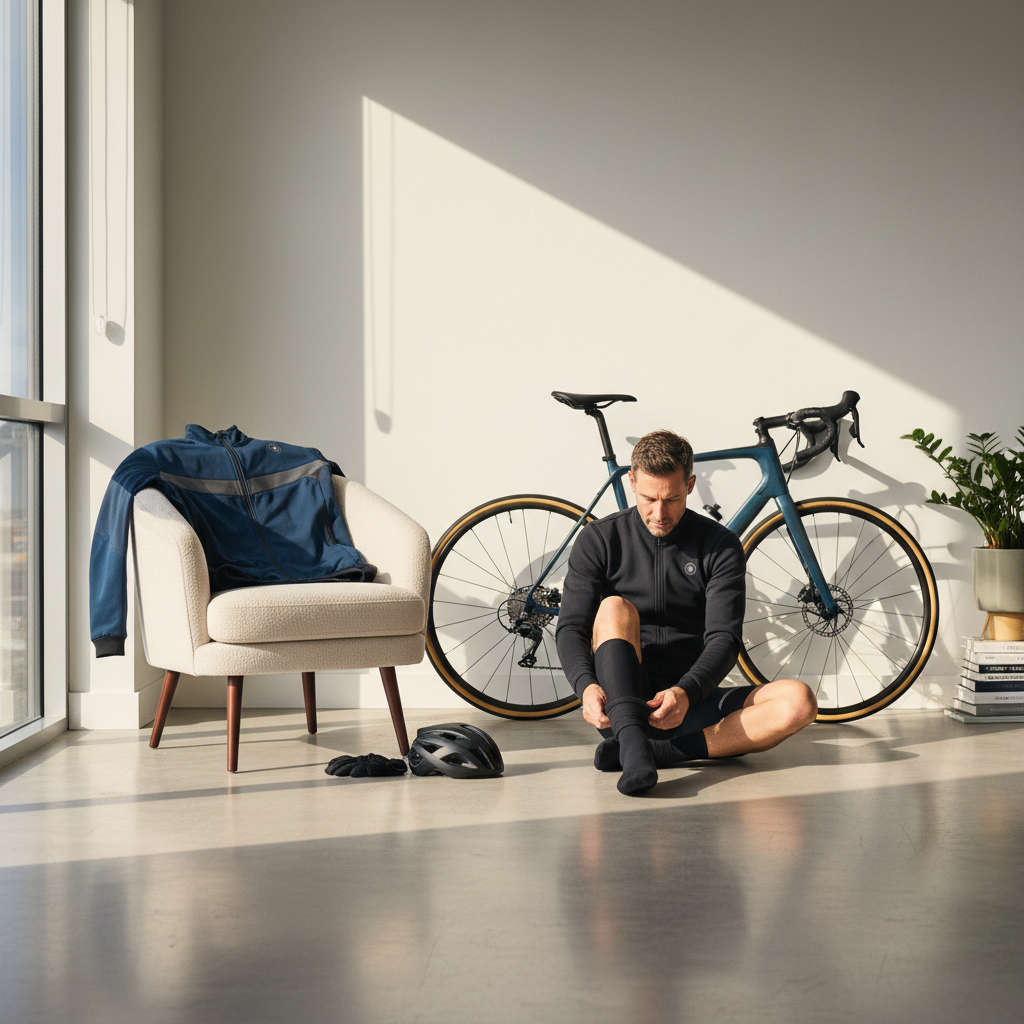
Practical setup: how to wear and layer knee warmers so they work
Even great warmers can feel bad if you layer them wrong. The goal is stable overlap, no cold bands, and minimal fabric fighting behind the knee.
Road and gravel layering steps
- Put warmers on before bib shorts if your shorts have a tight cuff and you want maximum security, many riders find this reduces slide.
- Use skin-friendly positioning: Keep the gripper on clean, dry skin. Sunscreen or heavy lotion can reduce grip.
- Pair with leg warmers only when needed: If your thighs are fine but knees get cold, knee-only is often more comfortable than full leg coverage.
- Match with socks and shoe covers: Cold feet often makes you “feel colder” overall, then you overdress knees and sweat more than necessary.
On-the-ride adjustment that actually helps
- If they slide, pull them up from the fabric body, not by yanking the gripper edge.
- If you get bunching behind the knee, rotate the warmer slightly so the seam sits off the crease line.
If you’re changing layers mid-ride, stash warmers in a pocket inside-out. That keeps road grime off the gripper and makes re-wearing less annoying.
Common mistakes (and small fixes that save a ride)
Most problems have simple causes, but they’re easy to miss when you’re shopping quickly.
- Buying too warm: Overheating leads to sweat, then you chill on descents. If you run hot, aim for breathable thermal, not heavy insulation.
- Ignoring inseam and length: A “medium” in one brand can be shorter than another. If you’re tall or have larger quads, sizing charts and rider feedback matter.
- Assuming wind block is always better: Windproof panels can be great, but many riders feel clammy unless temps are truly low or speeds are high.
- Washing too aggressively: High heat can weaken elastane and grippers, then the warmer stops staying up.
According to the CDC... cold weather increases risk of cold stress, and proper clothing is part of staying safe outdoors. If you’re frequently numb, shivering, or losing dexterity, it’s worth being more conservative with winter gear choices and ride plans.
When knee warmers aren’t enough (or you should ask a pro)
Warmers are comfort gear, not a fix for every knee issue. If you get sharp pain, swelling, or pain that persists off the bike, consider checking with a qualified healthcare professional or a bike fitter.
- Persistent anterior knee pain can relate to saddle height, cleat position, or training load, warmth may help symptoms but won’t address root causes.
- Numbness or color changes in skin can signal excessive cold exposure or circulation issues, in that case, prioritize safety and get advice.
- Frequent tendon irritation in winter might mean you need more gradual warm-ups and a slightly warmer setup, not just more intensity.
Many riders do well with a longer warm-up indoors or an easy first 15 minutes outside, then settle into pace once joints feel ready. It’s a small habit that often makes winter riding more sustainable.
Conclusion: choosing your best winter knee warmers
The best cycling knee warmers for winter are the pair you forget about mid-ride, they stay up, breathe well, and keep your kneecaps covered from start to finish. For most riders, that means starting with a quality thermal fleece-backed set, then upgrading to wind or DWR features only if your routes keep punishing you with exposure or spray.
Key takeaways:
- Prioritize fit before extra features, sliding defeats the whole point.
- Pick warmth for your effort level, not just the forecast.
- Layer with overlap at the shorts hem to avoid cold gaps.
If you want a simple next step, check your typical ride temps and speeds, then choose between thermal-only vs wind-assisted. After two rides, you’ll know if you need more protection or more breathability.