
how to clean a bike properly at home starts with one simple goal, remove grime without pushing it deeper into bearings, brakes, and your drivetrain.
If your bike squeaks, shifts poorly, or looks “clean enough” but still feels slow, it’s usually not because you skipped effort, it’s because the order and products matter more than people think. A quick hose blast can look satisfying, then a week later your chain sounds like sandpaper.
This guide lays out a realistic pro-style routine you can do in a driveway or apartment-friendly setup, with a time-based approach, a tool list that stays sensible, and a few guardrails so you don’t accidentally contaminate brake pads or wash out grease.
What “clean” means for a bike (and why pros do it in a specific order)
A bike isn’t a car, the “shiny” part is the easy part. The performance part lives in the drivetrain, the braking surfaces, and a few hidden places where grit collects. A pro clean usually follows the same logic: dry removal → controlled wet wash → targeted degrease → rinse carefully → dry → lube correctly.
Doing it in this order helps you avoid two common problems, turning grit into abrasive paste, and spreading degreaser onto parts that should stay oil-free.
- Drivetrain (chain, cassette, chainrings, derailleur pulleys): where noise and wear start.
- Brakes (rotors/rims and pads): where contamination ruins stopping power.
- Contact points (tires, bar tape, saddle): where clean also means safe and comfortable.
- Hidden zones (under the bottom bracket area, behind the fork crown): where road grime cakes up.
According to Park Tool, degreasers and lubricants should be used with control around braking surfaces because contamination can reduce braking performance and create persistent noise.
Quick self-check: what kind of clean does your bike actually need?
Before you start, decide if you need a light wash or a drivetrain reset. Most people overdo water and underdo drying, so this 30-second check keeps you honest.
- Light clean (10–20 min): frame has dust, chain looks slightly gray, shifting mostly fine, no black gunk on fingers.
- Standard clean (25–45 min): chain leaves dark marks, cassette looks oily, bike squeaks under load, pulleys look dirty.
- Deep clean (45–90 min): drivetrain has thick paste, shifting inconsistent, chain skips, or you rode in rain/salt or lots of dirt.
If you’re unsure, pick standard. It’s usually the sweet spot for how to clean a bike properly at home without turning it into an all-day project.
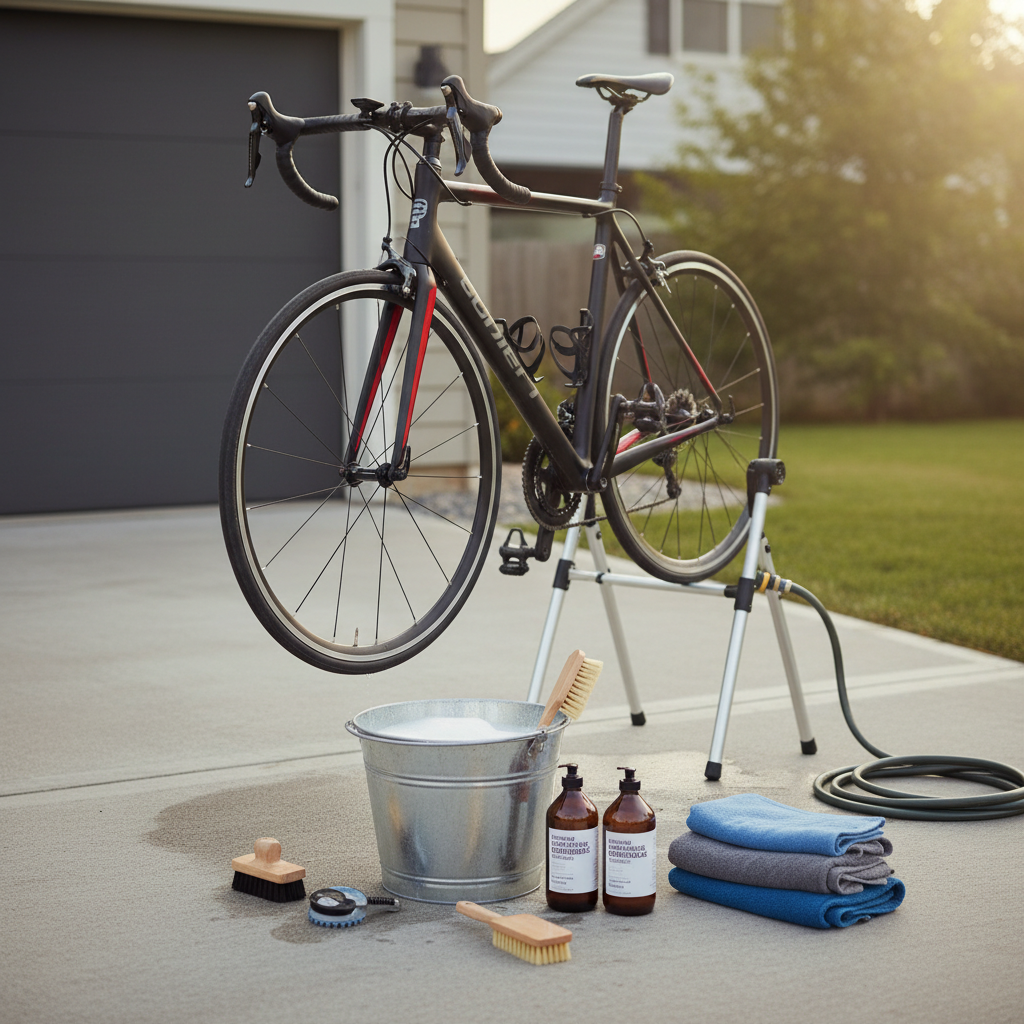
Tools and products: what’s worth buying vs. what’s optional
You can do a good job with basics, then add specialty tools only if you ride a lot. Keep it simple and keep it separate, especially anything that touches the chain.
Core kit (covers most riders)
- Two buckets, one for soapy water, one for rinse (even a second container helps)
- Mild bike wash or gentle dish soap (avoid harsh solvents on paint)
- Soft wash mitt or sponge for frame
- Soft brush set (one skinny brush helps around derailleurs)
- Degreaser (bike-specific or a mild citrus degreaser)
- Microfiber towels (at least two, one “clean,” one “dirty”)
- Chain lube matched to your conditions (dry vs wet)
Nice-to-have
- Chain cleaning tool (the clamp-on scrubber style)
- Bike stand (helpful, not required)
- Torque wrench for re-tightening parts if you remove anything
- Isopropyl alcohol for brake rotor wipe-down
Skip high-pressure washers. They feel efficient, but they can push water past seals into bearings. According to Shimano’s general maintenance guidance, avoiding high-pressure water around seals and bearings helps reduce premature wear.
Step-by-step: how to clean a bike properly at home (pro routine)
This is the routine that tends to work across road, gravel, and commuter bikes. Mountain bikes need the same logic, just more patience around grit.
1) Set up and protect the sensitive parts
- Put the bike in the smallest rear cog (easier to clean around the chain).
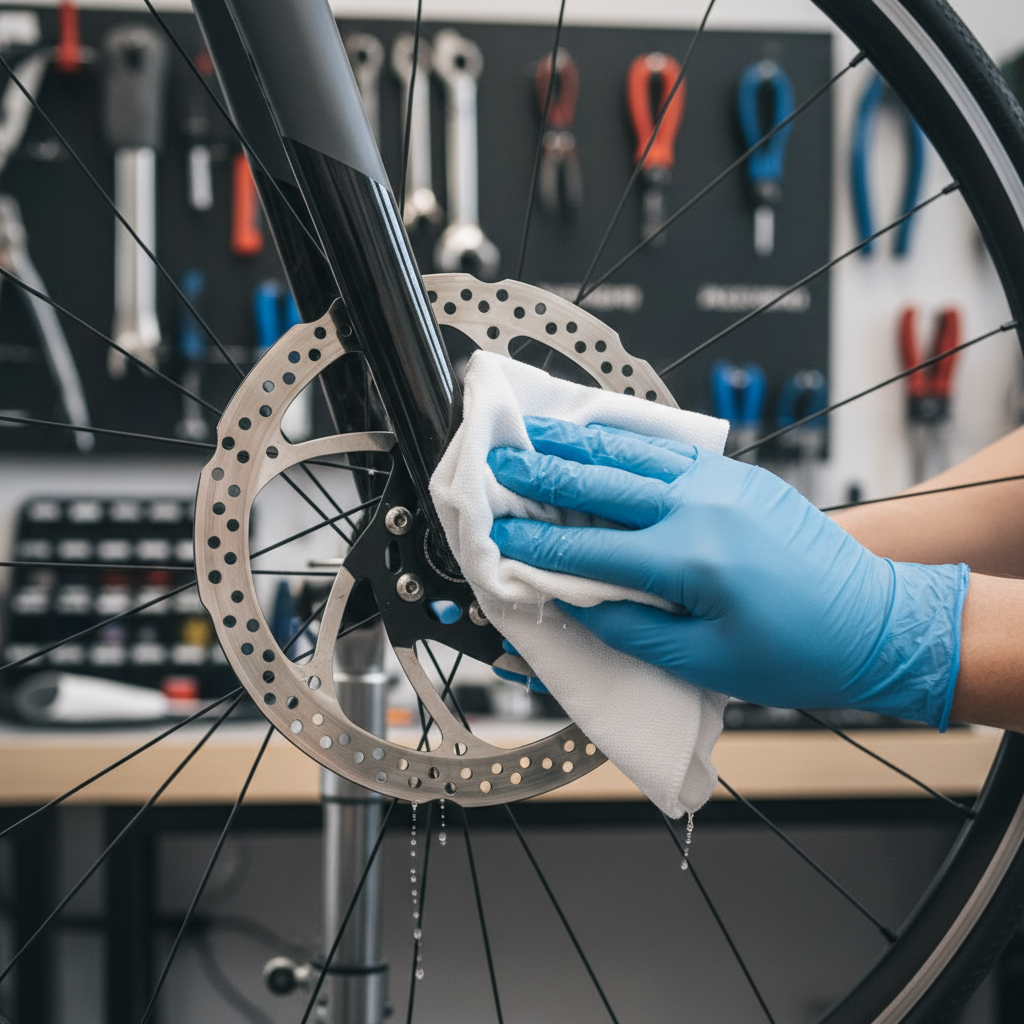
- If you have disc brakes, keep degreaser and lube well away from rotors and pads.
- Choose low-pressure water, a gentle spray bottle, or a damp cloth, not a blasting hose.
2) Dry wipe first (it saves time)
Knock off loose dust with a dry microfiber. This sounds small, but it prevents muddy streaks when you go wet.
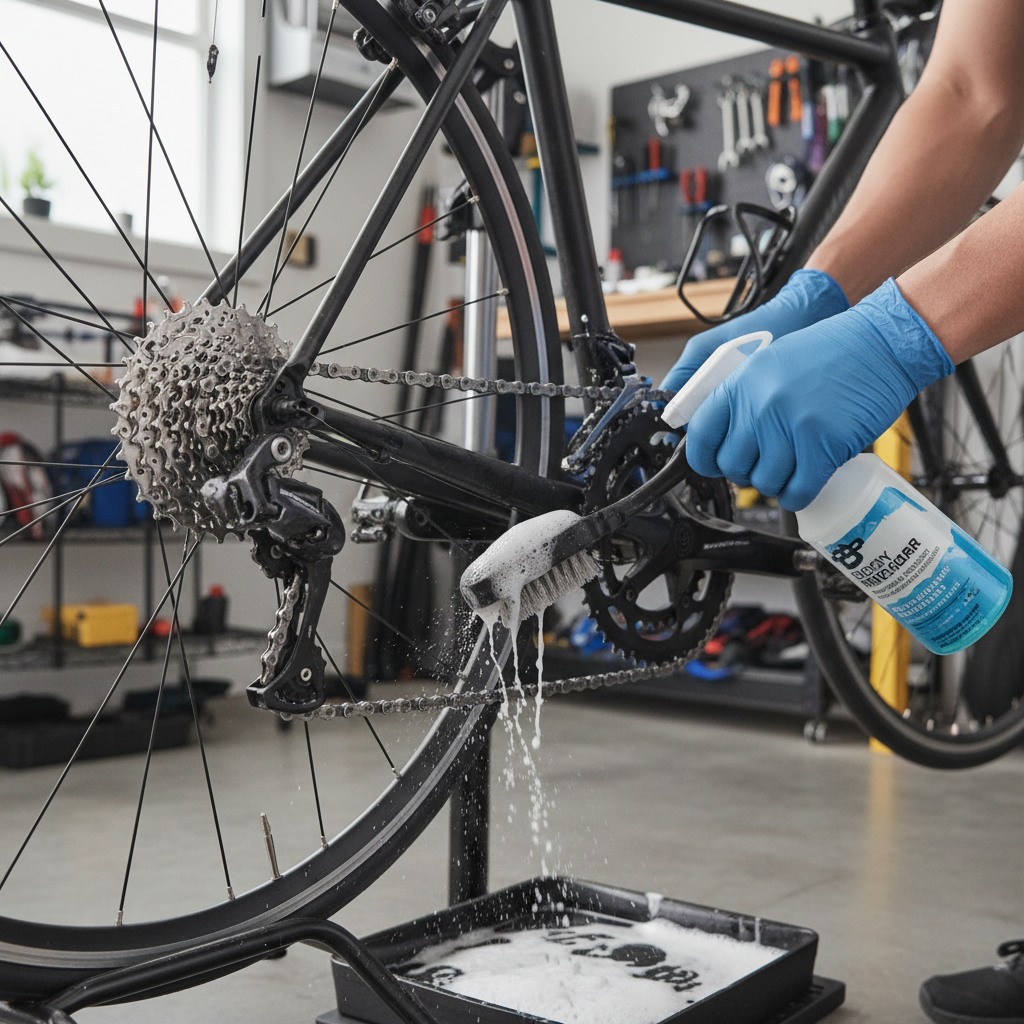
3) Clean the drivetrain (targeted, not messy)
- Apply degreaser to a brush or rag, not directly everywhere, especially near brakes.
- Scrub chainrings, cassette faces, and derailleur pulleys until the gunk breaks up.
- Run the chain backward through a degreaser-damp rag, repeat with a cleaner section.
If the chain stays black after several passes, you may be in deep-clean territory, and a chain cleaning tool can help.
4) Wash the frame and wheels
- Use soapy water and a soft sponge, start high and work down.
- Hit the “grime shelf” areas: behind the seat tube, under the down tube, around the bottom bracket zone.
- Use a separate brush for tires and rim sidewalls. Keep drivetrain brushes separate.
5) Rinse with restraint
Rinse using a gentle flow or a spray bottle. The goal is to remove soap, not to pressure-clean bearings. If you’re in an apartment setting, a damp rag “rinse” works surprisingly well.
6) Dry thoroughly
- Towel-dry the whole bike.
- Spin wheels to fling water off, then wipe near the hub area.
- Let it air-dry 10–15 minutes if possible before lubing.
7) Lube the chain correctly (this is where many cleans fail)
- Apply one drop per roller while slowly backpedaling.
- Wait a few minutes so lube can penetrate.
- Wipe off the excess until the outer plates feel almost dry. Excess lube is dirt magnet.
That wipe-down step is a big part of how to clean a bike properly at home so it stays clean for longer than one ride.
Time-saving cleaning plans (with a practical table)
If you ride often, the best cleaning routine is the one you’ll repeat. Use these as templates and adjust based on weather and surfaces.
| Scenario | What to focus on | Time | What to skip |
|---|---|---|---|
| After a dry road ride | Quick wipe, chain rag-clean, light lube if needed | 10–15 min | Full soap wash |
| Weekly commuter bike | Drivetrain scrub, frame wash, tire check | 25–40 min | Removing parts |
| After rain or gritty paths | Drivetrain degrease, careful rinse, full dry | 35–60 min | Leaving it “to dry on its own” |
| Before a big ride/event | Standard clean + bolt check + fresh lube | 45–75 min | Experimenting with new products |
Common mistakes that quietly cause squeaks, poor shifting, or weak braking
Most bike cleaning frustration comes from a few repeatable errors. Fix these and you’ll feel the difference on the next ride.
- Spraying degreaser everywhere, it travels, then brakes squeal or slip.
- Using high-pressure water, it can drive water into hubs, bottom bracket, and headset.
- Over-lubing the chain, it looks “protected,” then it collects grit and wears faster.
- Skipping drying, trapped moisture can cause rust on chain and bolts.
- Cleaning rotors with oily rags, even a little contamination can reduce braking.
If you suspect brake contamination, cleaning rotors with isopropyl alcohol often helps. Pads are trickier; in many cases they need replacement, and a bike shop can confirm the cause.
When a “clean” isn’t enough: signs you may need service
Cleaning solves a lot, but it can’t fix wear, alignment issues, or dried-out bearings. If you keep repeating how to clean a bike properly at home and the problem comes back immediately, look for these signs.
- Chain stretch (often called chain wear): shifting stays rough even after cleaning and correct lube.
- Grinding feeling when spinning wheels or cranks, could indicate bearing issues.
- Persistent brake squeal plus weak power, may be pad contamination or rotor issues.
- Derailleur hesitates or won’t hold gears, could be cable stretch, hanger alignment, or worn cassette.
If you’re not confident diagnosing drivetrain wear or brake problems, a local shop inspection is usually the safest move. Brakes are a safety system, and getting it checked can be worth the peace of mind.
Key takeaways you can follow every time
- Clean the drivetrain with control, keep degreaser away from braking surfaces.
- Low pressure water only, rinse gently and dry thoroughly.
- Lube lightly, then wipe, the wipe is what keeps future dirt from sticking.
- Pick a routine you’ll repeat, a 15-minute habit beats an occasional deep clean.
If you want one action today, do a standard clean, then pay extra attention to wiping the chain after lubing. That single habit usually makes the bike feel “fresh” for longer.
If you’re building a small home kit and want a more streamlined routine, it can help to use bike-specific cleaners and a dedicated chain tool so you spend less time scrubbing and more time riding.