
How to change a bike tube easily comes down to two things, keeping the process predictable and not letting small mistakes snowball into another flat a mile later.
If you ride in the U.S., chances are you’ve dealt with goatheads, glass, pothole pinches, or just an old tube that finally gave up, the frustrating part is that a “quick” tube swap can turn into a messy job when the bead won’t seat or the new tube gets pinched.
This guide keeps it practical, you’ll learn the fastest reliable method, what to check so you don’t repeat the flat, and a few small “pro habits” that usually save the most time.
What makes tube changes slow (and how to avoid it)
Most tube changes drag for the same handful of reasons, not because you’re “bad at it.” Fix these and you usually cut the time in half.
- You didn’t find what caused the flat, so the new tube gets punctured immediately.
- The bead fights you, often from low leverage or trying to remove too much tire at once.
- Pinching the new tube under the tire lever or tire bead, classic “snakebite” puncture.
- Valve issues, presta nut too tight, schrader not centered, valve hole burrs, or a crooked valve that stresses the tube.
- Rushing inflation before the tire is fully seated, which can pop the bead off or trap tube.
According to NHTSA, proper tire maintenance improves safety for road users, and while bicycles aren’t cars, the principle holds, good tire condition and correct inflation reduce avoidable incidents.
Quick self-check: do you need a tube swap, a patch, or something else?
Before you pull the wheel, take 30 seconds to decide what you’re actually doing, it saves time and frustration.
- Fast leak, obvious hole, or tube won’t hold air at all: swapping tubes is usually quickest.
- Slow leak you can’t hear: patching can work, but finding the puncture may take longer than a swap on the roadside.
- Tire has a slash, sidewall cut, or threads showing: a new tube alone may fail, you may need a boot, tire replacement, or a shop check.
- Rim tape shifted or torn: even a new tube can puncture on spoke holes, fix rim tape before riding far.
If you’re on an e-bike, cargo bike, or anything heavy, be conservative, tire and wheel forces are higher, and a shop can be the smarter call if you see rim damage.
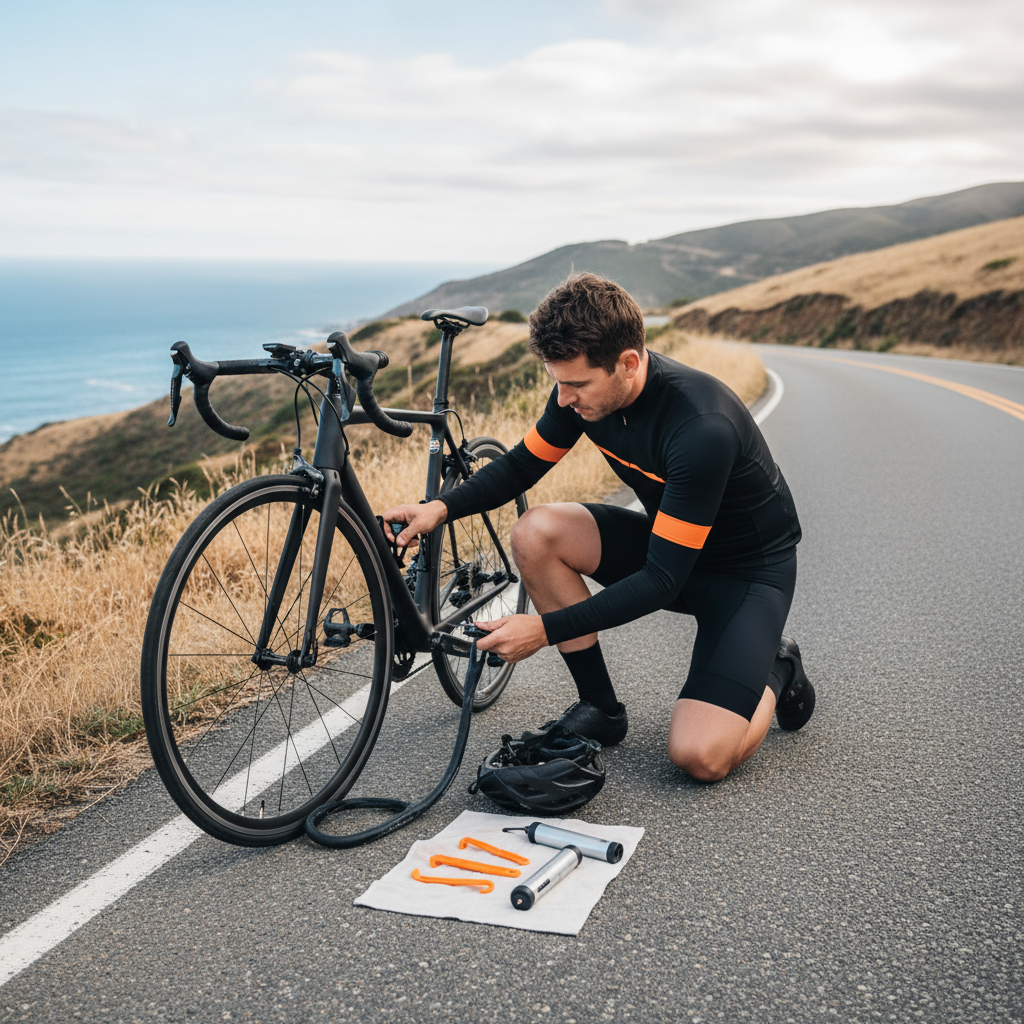
Tools and parts that actually help you go faster
You can change a tube with almost nothing, but “almost” is what slows people down. Here’s what tends to matter in real use.
- Correct tube size (tire width range matters), plus the right valve type (Presta or Schrader).
- Two tire levers, sturdy plastic is fine, metal can damage rims if you’re not careful.
- Pump you trust, a mini pump works, CO2 is fast but less forgiving for seating checks.
- Small rag or wet wipe for glass shards, dirty hands, and checking inside the tire.
- Optional time-savers: nitrile gloves, a tiny pressure gauge, a tire boot (or folded dollar bill as backup).
The fastest reliable method: step-by-step tube change
This is the sequence that stays quick because it reduces backtracking, you’re confirming things as you go.
1) Get safe and set up your “small parts” zone
Move off the road edge, flip the bike or lean it securely. Put your axle nuts, thru-axle, valve cap, and any washers in one spot so nothing disappears into grass.
2) Remove the wheel without fighting the drivetrain
- Rear wheel: shift into the smallest cog before stopping if you can, it makes wheel removal easier.
- Rim brakes: open the brake quick release so the tire clears.
- Disc brakes: avoid squeezing the lever with the wheel out, pads can close and create extra hassle.

3) Unseat one tire bead and pull the tube
Let all remaining air out. Start opposite the valve and push the tire beads into the center channel of the rim, this gives slack. Use a lever only if needed, and try to lift just one section of bead.
- Pop one side of the tire off the rim.
- Pull the tube out, leaving the tire on the rim.
- Remove the valve last, it prevents tugging the valve stem at a weird angle.
4) Find the cause before installing the new tube
This step feels “extra” until you skip it once and immediately flat again. Check in this order:
- Tire tread: look for glass, wire, thorns, staples, tiny shiny spots.
- Inside the tire: carefully run fingertips along the inside casing, slow and light, you’re feeling for sharp points.
- Rim strip/tape: confirm it covers spoke holes and sits centered.
If you found a sharp object, remove it. If you can’t find anything but the puncture repeats, the issue is often rim tape or a burr at the valve hole.
5) Install the tube without pinches
Add a small puff of air so the tube holds shape, not firm, just round. Insert the valve through the hole straight, then tuck the tube fully into the tire.
- Start seating the bead at the valve area, then work around.
- Finish opposite the valve, that’s where you have the most slack.
- Use palms and thumbs first, tire levers are the last resort because they can trap tube.
If you must use a lever for the final bit, keep it shallow, and push the tube away from the bead with your fingers before levering.
6) Seat the tire and inflate with two checkpoints
Before full inflation, do two quick checks that prevent most “mystery flats.”
- Pinch check: go around both sides, squeeze tire sidewalls and look for any tube showing.
- Bead line check: most tires have a molded line near the rim, verify it looks even all the way around.
Inflate gradually. If something looks uneven, release air and reseat instead of forcing pressure. Once it looks good, inflate to a reasonable pressure for your tire and rider weight, if you’re unsure, stay mid-range on the tire sidewall label.
Common mistakes that cause a second flat
When people say “I changed the tube and it still went flat,” it’s usually one of these.
- Leaving the puncture culprit in the tire, especially tiny wire or a thorn tip.
- Tube trapped under bead, often near the last tight section.
- Valve stem pulled sideways, can tear at the base over time, straighten the valve before final inflation.
- Incorrect tube size, too narrow stretches thin, too wide folds and pinches.
- Overinflation on a tire not seated evenly, can “burp” or pop.
Time-saving table: problems and quick fixes
If you’re troubleshooting on the side of the road, this is the fast decision map.
| Issue | What you’ll notice | Quick fix |
|---|---|---|
| Bead won’t come off | Tire feels glued to rim | Push beads into rim center channel, start opposite valve, use two levers only after that |
| New tube pinches | Instant flat or hiss during install | Add slight air to tube, avoid lever near tight section, do full pinch check before inflating |
| Tire won’t seat evenly | Wobble or bulge near rim | Deflate, massage tire sidewalls, add a little air, re-check bead line all around |
| Slow leak after swap | Pressure drops over hours | Check valve core tightness, inspect rim tape, inspect tire for micro-debris |
| Frequent pinch flats | Two parallel holes in tube | Increase pressure a bit, avoid curbs/potholes, consider wider tire or tougher casing |
Practical tips to make the next change even easier
This is the stuff people adopt after their third roadside flat, small habits, big payoff.
- Carry one known-good spare tube and patch the old one later at home.
- Mark the tire at the valve when you remove the tube, then match the puncture location to the tire spot to find the cause faster.
- Don’t fully remove the tire unless you must, one bead off is usually enough.
- Practice once at home with good light, it’s the easiest way to learn how your specific rim and tire behave.

When to call a bike shop (or a more experienced friend)
If you’re trying how to change a bike tube easily and it keeps turning into repeat flats, it’s not always “user error.” A quick professional look can save money and time.
- Rim damage such as dents, sharp edges, cracked rim walls.
- Sidewall cuts or a tire that shows casing threads.
- Tubeless setups where the “tube swap” is only a temporary fix and sealing issues keep returning.
- E-bike wheels with hub motors, torque washers, or complicated axle hardware.
According to PeopleForBikes, routine maintenance and correct equipment setup support safer, more comfortable riding, if you’re unsure about wheel or brake hardware, asking a shop is a reasonable move.
Key takeaways before you roll out
- Always inspect the tire inside and out before installing the new tube, this is the real “speed hack.”
- Add a small puff of air to the tube during install, it helps avoid pinches.
- Seat the bead carefully and do a quick pinch check before full inflation.
- Carry the right tube and a dependable pump, the best technique still needs the right basics.
If you want to get faster at this, pick one wheel this week and do a calm practice swap at home, then pack the exact tools that worked. Next time you’re stuck roadside, you won’t be improvising.