
how to use a hydration pack for cycling comes down to three things most riders overlook: fit, hose management, and keeping the system clean enough that you actually want to drink from it. If any one of those is off, you end up sipping less than you planned, dealing with slosh, or fighting leaks at the worst time.
A hydration pack can be the difference between a smooth ride and the "why do I feel so flat" spiral, especially on long gravel days, hot commutes, or mountain bike laps where stopping breaks your rhythm. The pack itself is simple, but the setup is where real-world headaches show up.
This guide focuses on practical setup, how to drink efficiently while riding, what to do when things taste weird or leak, plus a quick decision table so you can choose a pack style that matches your routes. I’ll keep the advice grounded, because conditions vary a lot by climate, intensity, and personal sweat rate.
Choose the right hydration pack setup for your ride
Not every “hydration pack” behaves the same on a bike. Small design differences change how stable it feels, how easy it is to sip, and how annoying it becomes at mile 30.
- Bladder capacity: 1.5L often fits shorter rides and reduces weight, 2L is common for longer outings, 3L can make sense in heat or when refills are unlikely.
- Bike-focused fit: look for a stable harness, a sternum strap, and ideally a waist strap to cut bounce on rough terrain.
- Routing options: hose guides on both shoulder straps help you choose left or right routing depending on how you brake and shift.
- Insulation and airflow: insulated sleeves slow warming, ventilated back panels reduce the swampy feeling, neither is magic in extreme heat.
According to CDC, drinking enough fluids is a key part of preventing dehydration during heat exposure. That’s a broad public-health point, but it translates well to cycling: if you wait until you feel thirsty, you may already be behind.
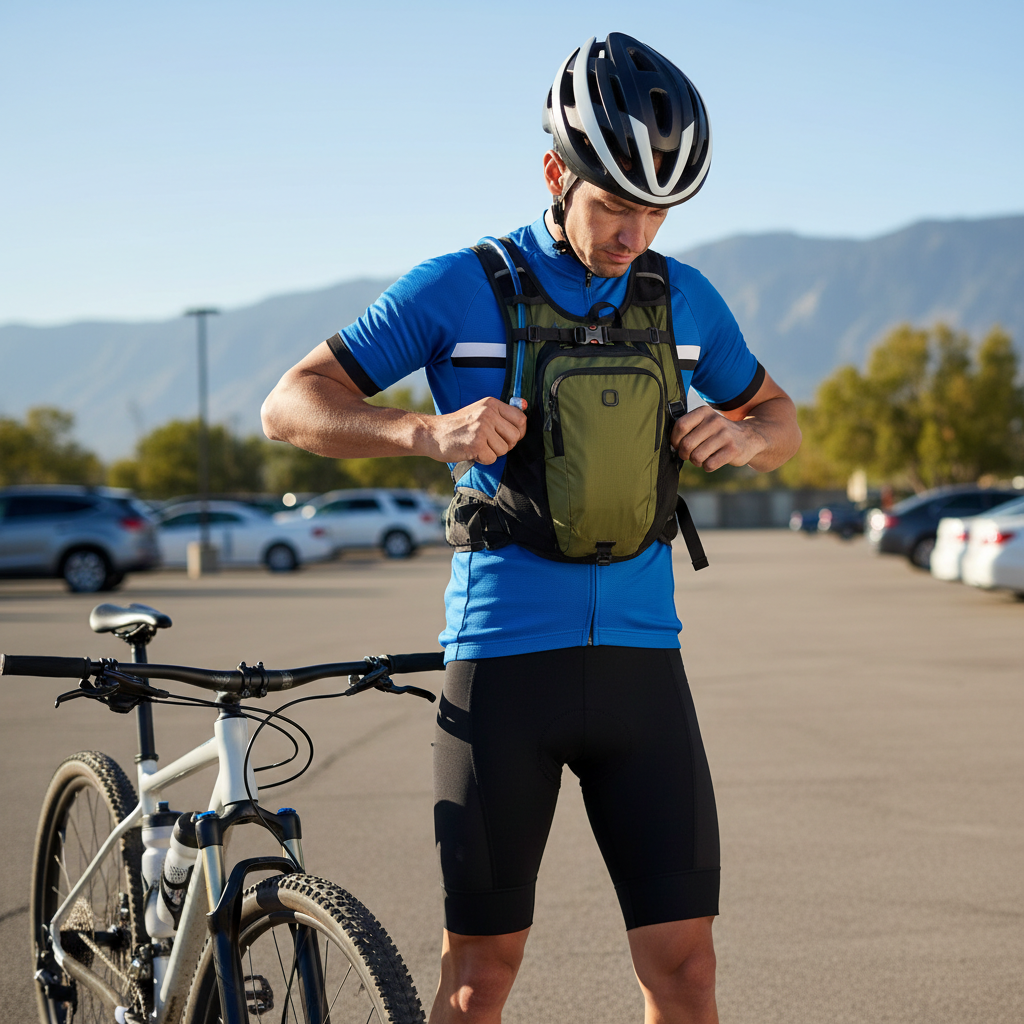
Fit and adjust it so it doesn’t bounce or rub
The most common reason people “hate” riding with a pack is poor adjustment, not the pack itself. A good fit should feel snug, not restrictive, and stable when you stand up to pedal.
Quick fit steps (takes 2 minutes)
- Start empty and loosen straps, put the pack on like a jacket.
- Tighten shoulder straps until the pack sits high between shoulder blades, not sagging mid-back.
- Clip the sternum strap at a comfortable height, then tighten just enough to stop strap drift.
- If you have a waist strap, snug it lightly, this reduces sway more than you’d think.
- Fill the bladder halfway and do a few hops, then fine-tune for stability.
Watch for two red flags: numb hands can mean straps pull your shoulders forward, and neck rubbing often means the pack rides too high or the sternum strap sits too close to your throat. Small changes matter here.
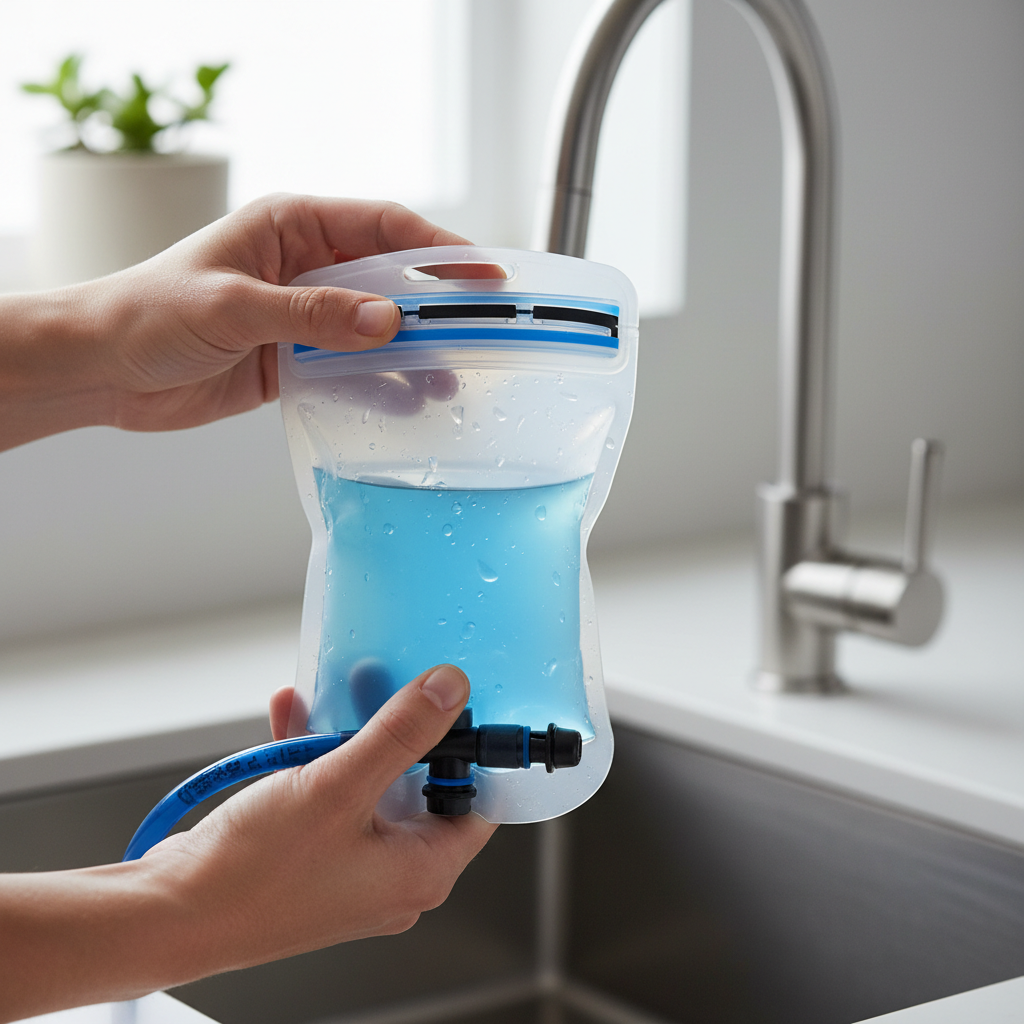
Fill, seal, and prime the bladder to avoid leaks and “air sips”
If you want to master how to use a hydration pack for cycling, learn the “fill and prime” routine. Most leaks come from rushed closure or a twisted hose connection, and most frustration comes from sucking air because the line isn’t primed.
Filling without making a mess
- Open the bladder wide, rest it in a sink or deep bowl, then fill slowly to reduce trapped air.
- Don’t overfill if you hate slosh, leaving a small air gap helps, but too much air increases movement.
- Wipe the seal track and close it carefully, run your fingers across the entire closure to confirm it’s fully seated.
Prime the hose
- Hold the bite valve below the bladder level.
- Squeeze and sip until water reaches the valve, then close the valve or lockout if your model has one.
That priming step sounds fussy, but it reduces the “nothing’s coming out” moment right when your breathing rate jumps on a climb.
Manage the hose and bite valve so drinking feels effortless
On the bike, the easiest hydration system is the one you can use without thinking. Hose management is a small “set it once” job that pays off every ride.
- Route the hose along the shoulder strap and secure it in the keeper loop so it doesn’t whip in the wind.
- Position the bite valve around upper chest height so you can reach it with a slight head tilt, not a full neck crane.
- If your valve has a lock, use it for transport and when you toss the pack in the car, many “mystery leaks” happen off-bike.
- On mountain bike trails, tuck excess hose length to avoid snagging on branches.
Some riders prefer routing on their non-dominant side so their dominant hand stays relaxed on the bar, but comfort and your cockpit layout matter more than any rule.
Drink on a schedule you can actually follow
Many cyclists carry plenty of water and still underdrink, mostly because they wait too long, then try to chug. The more realistic approach is small, consistent sips that match effort and heat.
A simple “sip rhythm” that works for many rides
- Take a few sips every 10–15 minutes on steady terrain.
- On climbs, sip earlier than you think, once you’re gasping, drinking gets awkward.
- In hot or dry conditions, increase frequency and consider electrolytes if you’re sweating heavily, individual needs vary.
According to American College of Sports Medicine, fluid needs vary by person and conditions, and monitoring hydration status is important for performance and safety. If you’re dealing with medical conditions or heat illness history, it’s smart to ask a clinician for personalized guidance.
Quick troubleshooting: leaks, warm water, weird taste, and bounce
When a pack annoys you, the fix is usually straightforward, you just need a fast checklist instead of random tinkering mid-ride.
- Leak near the top seal: reopen, wipe the seal channel, reseat carefully, then test upside down over the sink.
- Leak at hose connection: push the quick-connect until it clicks, check O-ring for damage, replace if worn.
- Warm water: start with cold water, add ice if your bladder allows it, insulate the hose, keep the pack out of direct sun at stops.
- Plastic taste: rinse, then soak with baking soda solution, or use a bladder cleaning tablet, taste often fades after a few cycles.
- Too much bounce: tighten waist strap slightly, raise the pack position, reduce trapped air, avoid overfilling if slosh drives you crazy.
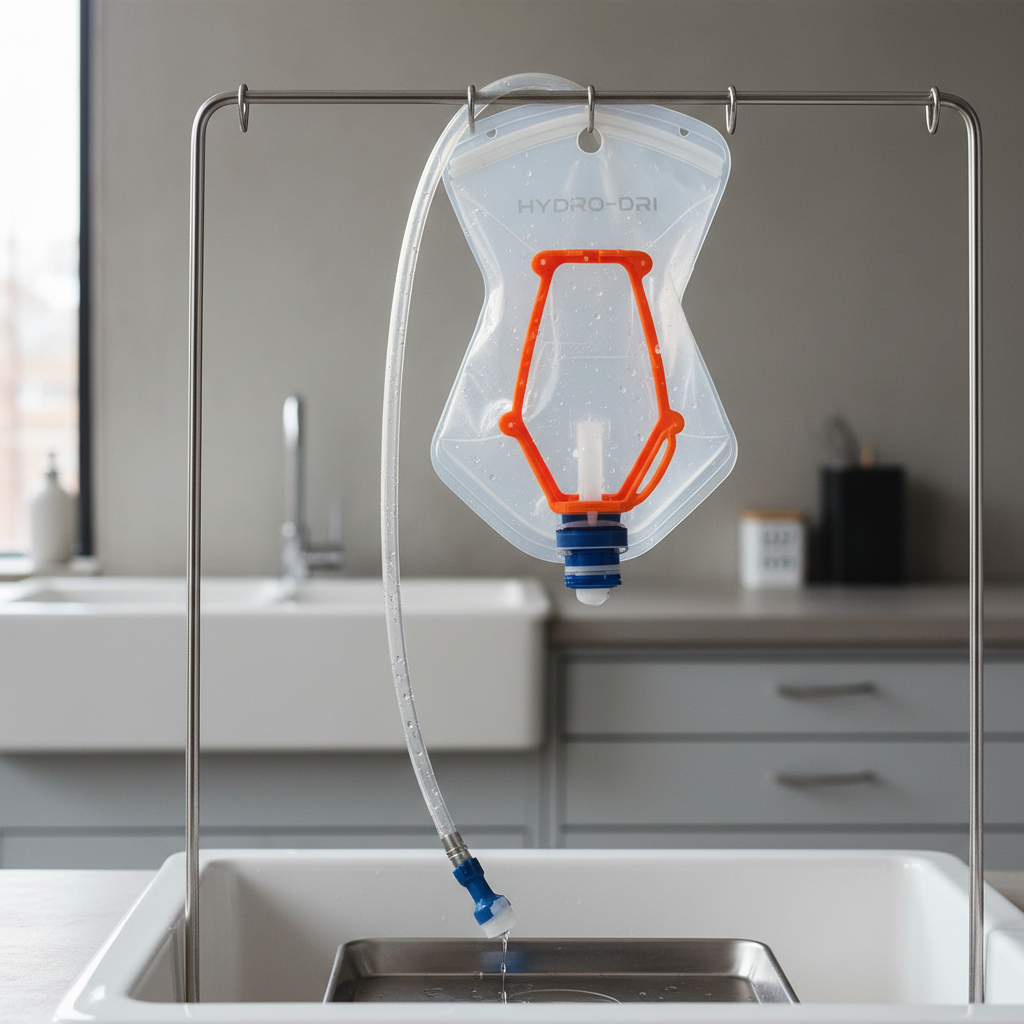
Cleaning and drying, the part that decides whether you keep using it
If you’re serious about how to use a hydration pack for cycling week after week, cleaning is the make-or-break habit. A neglected bladder turns “I should drink” into “nope,” and that defeats the whole point.
After-ride routine (fast version)
- Empty, rinse with warm water, then drain fully.
- Blow air through the hose to clear standing water, or swing the hose gently to help it drain.
- Dry it open: prop the reservoir open to airflow, drying matters as much as washing.
Weekly or when taste/smell appears
- Use mild soap and a soft brush kit, or a purpose-made cleaning tablet.
- Rinse thoroughly, leftover soap taste is common if you rush this part.
- Let everything air-dry completely before storage.
According to U.S. Food & Drug Administration, keeping food-contact surfaces clean helps reduce microbial growth. Hydration bladders aren’t exactly kitchenware, but the principle holds: moisture plus residue plus warmth invites problems.
Practical packing tips and a simple decision table
A cycling hydration pack often doubles as “my pockets,” which is great until you create a heavy, lopsided brick on your back. Keep weight close to your spine, and avoid stacking hard items against the bladder.
- Put tools, pump, and multi-tool low and centered.
- Keep snacks where you can reach without unpacking everything.
- Separate keys/phone from the bladder, condensation can happen.
Which setup fits which ride?
| Ride scenario | What usually works | Why |
|---|---|---|
| 1–2 hour road ride with frequent stops | 1.5–2L bladder or bottles | Lower weight, easy refills |
| MTB trail riding, rough terrain | 2L bladder + strong waist strap | Stability matters more than capacity |
| Hot-weather gravel ride, limited water access | 2–3L bladder + electrolytes | More fluid options, fewer stops |
| Commuting with laptop or work gear | 2L bladder in a pack with compartments | Organization and leak protection |
Key takeaways to remember on your next ride
- Fit high and snug so the pack moves with you, not against you.
- Prime the hose, then set the valve where you can reach it easily.
- Use a sip rhythm, don’t wait for thirst to “remind” you.
- Rinse and dry after rides, deep clean when taste changes.
Conclusion: make hydration automatic, not a chore
Once you dial in how to use a hydration pack for cycling, it stops feeling like extra gear and starts feeling like a quiet advantage, you drink more consistently, you stop less, and you spend less mental energy fiddling with bottles and cages.
Your best next step is simple: do a two-minute fit check, prime the hose, then set a sip timer for the first few rides until the habit sticks. If you notice heat illness symptoms like dizziness, confusion, or chills, it’s safer to stop riding and seek medical advice, especially in high heat.
If you want a more “set-and-forget” setup, consider pairing a bike-specific hydration pack with a cleaning kit and a spare bite valve, it’s not glamorous, but it saves the most time and frustration over a season.