
how to attach a bike trailer to bike comes down to two things most people miss on the first try: matching the correct hitch style to your bike, and doing a quick safety check that catches wobble before you roll out.
If you are hauling a kid, a dog, or even just groceries, a trailer that is “mostly attached” is not good enough. A small mistake, like a loose coupler or the wrong axle hardware, can turn into fishtailing, rubbing on the tire, or a trailer that pops off at the worst moment.
This guide keeps it practical: you will identify your hitch type, attach it step by step, run a short checklist, and know when it is smarter to ask a bike shop for help. I will also call out the common “looks fine” errors that cause most issues.
Know your hitch type before you touch a wrench
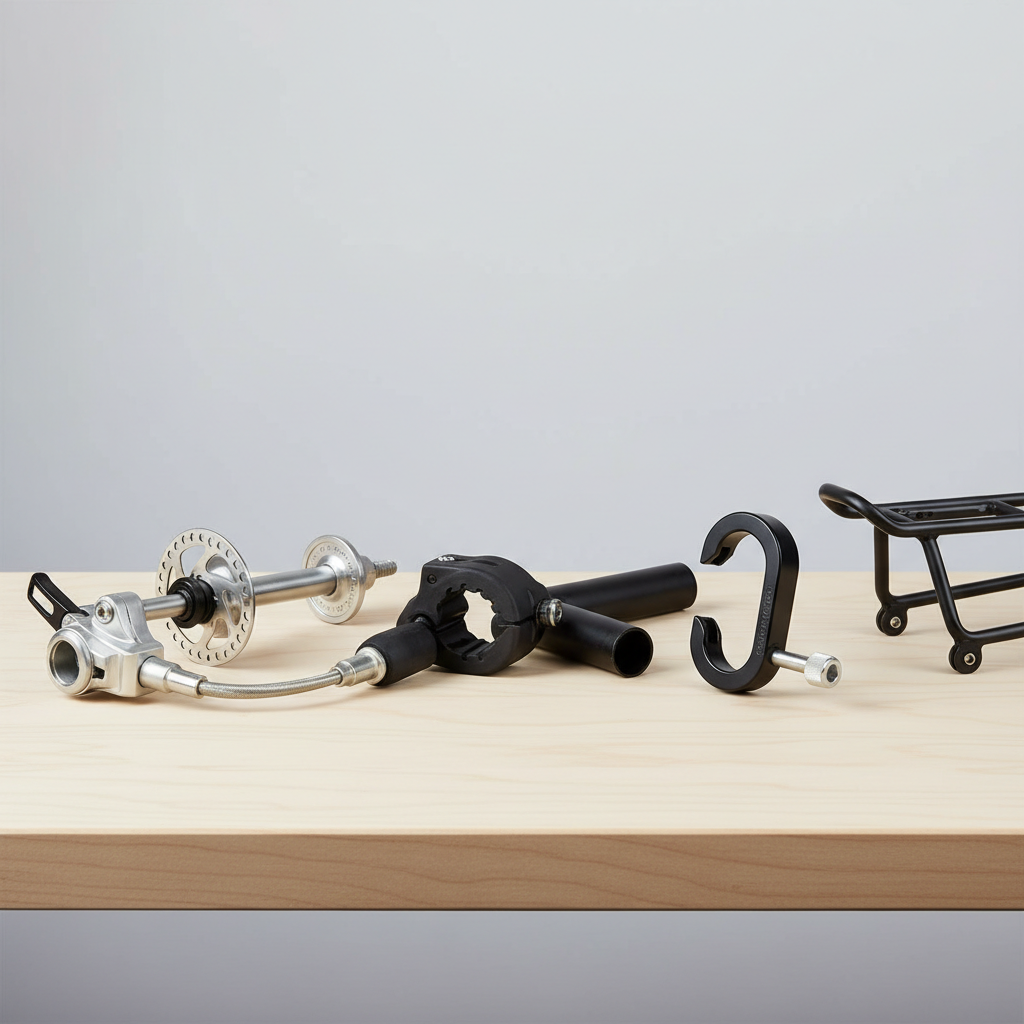
Most trailers attach in one of a few common ways, and the right steps depend on which one you have. If you are not sure, look at the part that stays on the bike, that is the hitch or coupler.
- Rear axle hitch (most common for kid/cargo trailers): a metal plate or bracket sits at the rear axle, and the trailer arm pins into it.
- Chainstay/seatstay clamp hitch: a clamp wraps around the frame near the rear triangle, then the trailer arm connects.
- Rear rack hitch: the trailer attaches to a special rack-mounted point, usually for lightweight cargo.
- Thru-axle bikes: many modern bikes need a specific adapter, because a standard quick-release hitch plate will not fit.
According to the National Highway Traffic Safety Administration (NHTSA), being visible and predictable in traffic reduces crash risk, and trailer setup directly affects stability and tracking. That is why hitch compatibility matters more than it seems at first glance.
Tools and parts you usually need (and what to avoid)
You can attach many trailers with basic tools, but “basic” depends on your axle type. Gather things first so you are not improvising mid-install.
- For quick-release rear axles: no tool, sometimes a 15 mm wrench if you have axle nuts.
- For thru-axles: correct thru-axle adapter and a hex key, often 5 mm or 6 mm.
- For clamp hitches: hex keys plus a torque wrench if you have one.
- Helpful extras: light grease, a rag, and a bike pump for correct tire pressure.
Avoid stacking random washers to “make it fit” unless the trailer manufacturer explicitly allows it. In real life, that workaround is where alignment and clamping force get weird.
Step-by-step: how to attach a bike trailer to bike (rear axle hitch)
This is the setup most people have. The goal is a tight, straight hitch plate at the axle, plus a fully seated coupler with the safety strap secured.
1) Stabilize the bike
Put the bike on level ground. If you do not have a stand, flip it upside down only if it will not damage accessories, or have someone hold it steady. A wobbly bike leads to a crooked hitch.
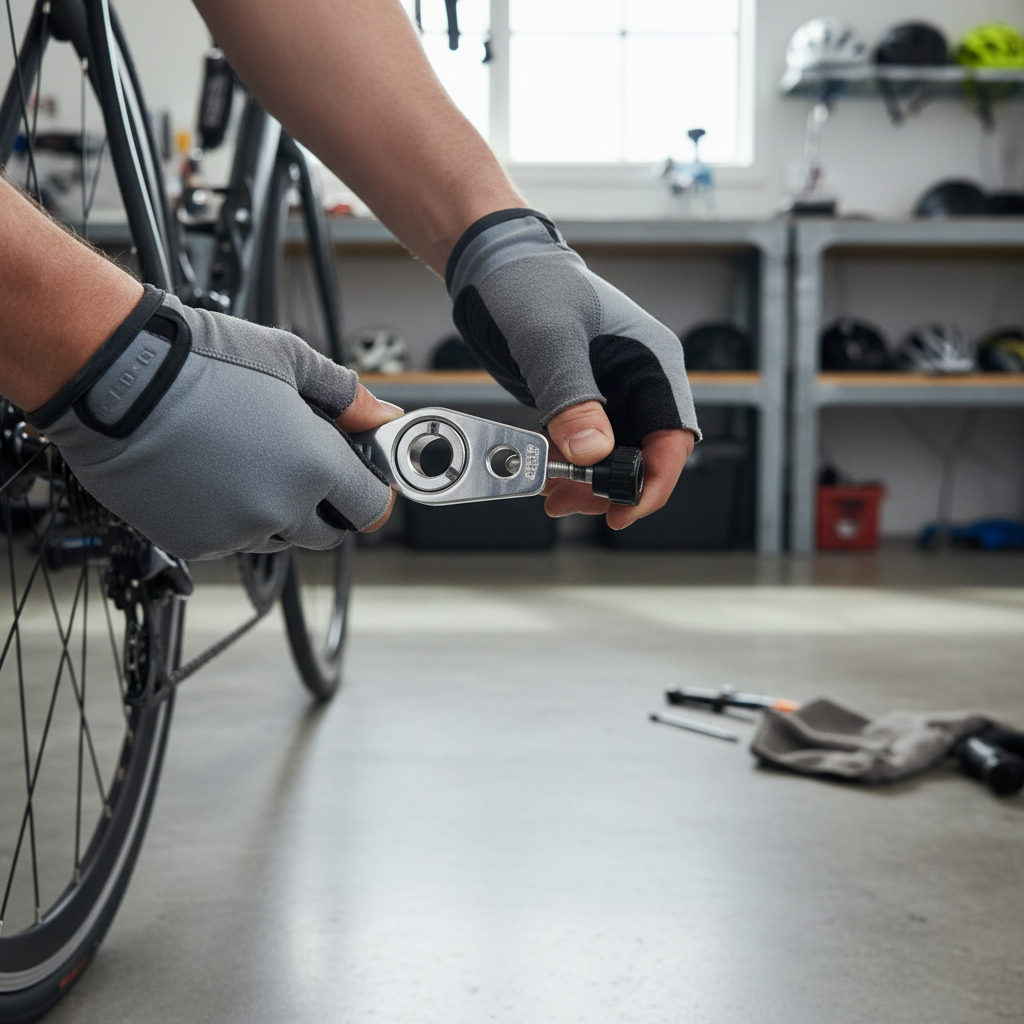
2) Loosen the rear axle correctly
- Quick-release (QR): open the lever, loosen the nut a few turns, keep the wheel seated in the dropouts.
- Axle nuts: loosen both sides evenly, keep chain tension and wheel position consistent.
Try not to pull the wheel out. If it slips, re-seat it fully in the dropouts before tightening anything.
3) Place the hitch plate in the right orientation
Most hitch plates sit on the outside of the frame at the axle, with the connector point facing slightly rearward. If yours has a bend or offset, follow the trailer manual so the plate clears the frame and the trailer arm stays level.
4) Tighten the axle with proper force
Close the QR lever so it leaves a firm imprint in your palm, it should not swing shut with zero resistance. For axle nuts, tighten securely and evenly. If your bike uses a torque spec, follow it.
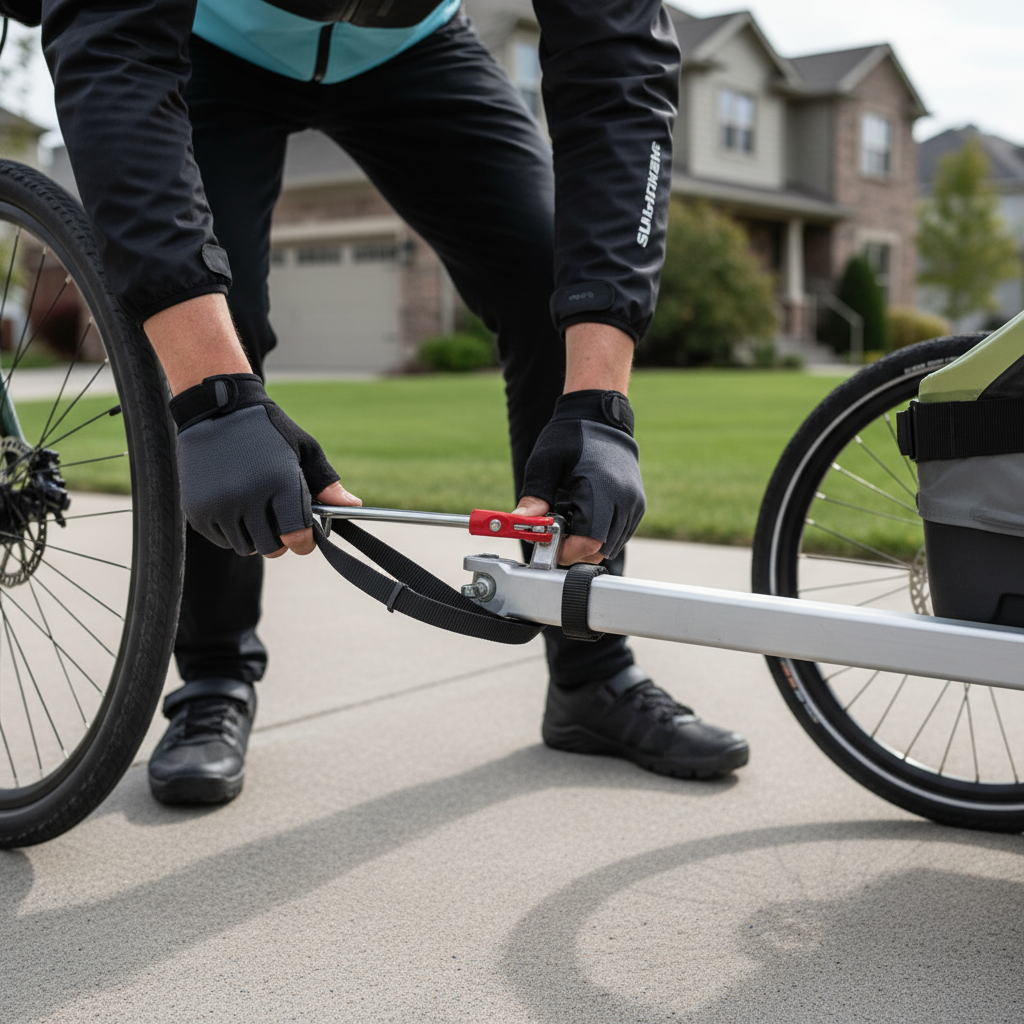
5) Connect the trailer arm to the hitch
Slide the coupler onto the hitch pin or post, then insert the locking pin or secure the latch. Give the trailer arm a short tug; it should not slip off or rotate excessively.
6) Add the safety strap the way the manufacturer intends
Many trailers include a strap that loops around the frame, not the rack. Strap routing matters because it is the backup if the main connection fails.
- Loop around a solid part of the rear triangle, often the chainstay or seatstay.
- Do not loop around a removable rack unless the brand tells you to.
- Keep the strap away from the rotor and spokes.
Thru-axle and disc brakes: the two situations that trip people up
If you have a thru-axle, the “standard” hitch plate often cannot be clamped safely. You usually need a purpose-built thru-axle with the correct thread pitch and length for your frame.
- Confirm axle specs: length (mm), thread pitch (like M12 x 1.5), and axle type.
- Use an approved adapter: many trailer brands sell adapters, and some third-party axle makers list compatibility by bike model.
- Watch disc rotor clearance: the hitch hardware must not push the caliper/rotor alignment out of spec.
With disc brakes, also look at where the trailer arm passes. If the arm sits too close to the rotor side, you might need to mount the hitch on the non-drive side as instructed, or use a spacer that is approved for your setup.
Quick self-check before every ride (takes 30 seconds)
People ask for a “one-and-done” install, but with towing, you really want a tiny routine. It is not paranoia, it is just what keeps the ride calm.
- Hitch tightness: no visible gap at the axle plate, no movement when you push side to side.
- Pin/latch locked: the retaining clip fully seated, not halfway.
- Safety strap present: routed around frame, not twisted into spokes.
- Trailer wheels: both fully clicked into place, no wobble at the hub.
- Tire pressure: bike and trailer tires inflated, soft tires make trailers sway.
- Clearance: trailer arm clears the rear derailleur, rotor, and fender across turns.
If anything feels “gritty” or inconsistent when you wiggle the trailer arm, stop and reset the connection. Many minor issues are just a coupler not fully seated.
Common problems and fixes (what to try before you give up)
- Trailer leans to one side: check that the bike wheel is seated straight in the dropouts and the hitch plate sits flat, then re-tighten.
- Coupler keeps rotating or clunking: confirm you used the correct bushing/spacer set for your hitch, some brands include multiple inserts.
- Trailer arm rubs the tire: hitch may be on the wrong side, or the plate orientation is flipped.
- Hard to insert the pin: alignment is off, move the trailer slightly so the arm lines up without force.
- Disc rotor rub after installing: hardware might be interfering, remove and reassess, a bike shop can confirm safe spacing.
One subtle issue: if you upgraded from QR to thru-axle, your old “universal” hitch might still bolt on, but the clamping force and fit can be wrong. That is a quiet failure mode, so it is worth treating seriously.
Compatibility and setup table (fast match guide)
Use this as a quick reality check before ordering an adapter or spending an hour troubleshooting.
| Bike rear end | Most likely hitch solution | What to double-check |
|---|---|---|
| Quick-release skewer | Standard axle hitch plate | Wheel seated, QR tightness, plate orientation |
| Solid axle with nuts | Axle hitch plate (nut-compatible) | Thread engagement, even tightening, washer order per manual |
| Thru-axle (road/gravel/MTB) | Thru-axle adapter specific to your axle specs | Thread pitch, axle length, rotor/caliper clearance |
| Carbon frame with clamp hitch option | Usually axle-based solution recommended | Clamp pressure risk, manufacturer guidance |
| E-bike rear hub motor | Model-specific adapter or axle-nut hitch | Cable routing, axle hardware stack, torque arms |
Safe first ride: keep it boring on purpose
After you attach everything, do a short test loop close to home, no passenger, light cargo only. You are listening for clunks and watching for sway.
- Start with wide turns and slow speed, then do a few tighter turns to confirm clearance.
- Brake gently, then a bit harder, to see if the trailer pushes the bike.
- Re-check the hitch after 5–10 minutes: new hardware can settle.
According to the Consumer Product Safety Commission (CPSC), using products as instructed and maintaining equipment reduces injury risk. If any part of your setup differs from the trailer manual, treat that as a sign to pause and verify.
Key takeaways (so you do not overthink it next time)
- Pick the right hitch style for your axle and frame, compatibility beats force.
- Lock the coupler and use the safety strap, both matter.
- Do a 30-second check before rides, especially after transport or storage.
- If you have a thru-axle or an e-bike, plan on an adapter that matches exact specs.
When to get professional help (and why it is reasonable)
If any of the points below apply, a quick visit to a local bike shop often saves time and avoids risky guesswork. This is especially true when towing kids or heavier cargo.
- You have a thru-axle and cannot confirm thread pitch and axle length.
- The hitch hardware interferes with disc brakes, the derailleur, or the frame.
- Your bike has carbon dropouts or a carbon rear triangle and the trailer suggests a clamp.
- The trailer sways even after re-installing and checking tire pressure.
If you are ever unsure whether your configuration is safe, it is worth consulting the trailer manufacturer support or a qualified mechanic, small fit issues can turn into bigger problems under load.
Wrap-up: attach it once, verify it every time
Getting how to attach a bike trailer to bike right is mostly about doing the unglamorous steps: correct hitch, correct tightness, locked coupler, safety strap, then a calm test ride. Once you dial that in, hooking up becomes a quick routine.
If you are attaching a trailer this week, do two things today: confirm your axle type and hitch compatibility, then run the 30-second pre-ride check before you tow anything valuable.
FAQ
How do I know if my bike needs a thru-axle adapter for a trailer?
If your rear wheel uses a bolt-in axle that threads into the frame, it is likely a thru-axle. Many trailers need a specific adapter because a quick-release hitch plate cannot clamp correctly on that system.
Can I attach a bike trailer to a carbon frame?
Often yes, but it depends on the hitch style and what the bike and trailer brands allow. Many riders avoid clamp-style hitches on carbon and prefer axle-based solutions, when compatible.
Why does my trailer feel like it is fishtailing?
Common causes include low tire pressure, a loose axle/hitch connection, or uneven cargo weight. Re-check the coupler lock, confirm the wheel is seated straight, then balance the load low and centered.
Is it okay to tow with a rear rack hitch?
It can be fine for lightweight cargo setups designed for that system, but many kid trailers are not meant for rack mounting. If your trailer manual shows an axle mount, follow that guidance.
Do I really need the safety strap if the pin is locked?
In many designs the strap is the backup connection, and it is quick to use. If the main coupler fails or the pin is not fully seated, the strap can prevent a complete separation.
My hitch plate does not sit flat against the frame, what now?
Stop and re-check orientation and axle seating. If it still will not sit flat without forcing it, you may have the wrong adapter or hardware stack, and it is better to confirm compatibility than to “make it work.”
Can I attach a trailer to an e-bike?
Many e-bikes can tow, but rear hub motors, torque arms, and nonstandard axle hardware can complicate hitch fit. Check the e-bike manufacturer guidance and consider a shop install if clearance is tight.
If you are attaching a trailer for the first time, or switching bikes and want a more hassle-free setup, it can help to share your axle type, brake type, and trailer model with a bike shop or the trailer brand support so you get the correct adapter and avoid trial-and-error.